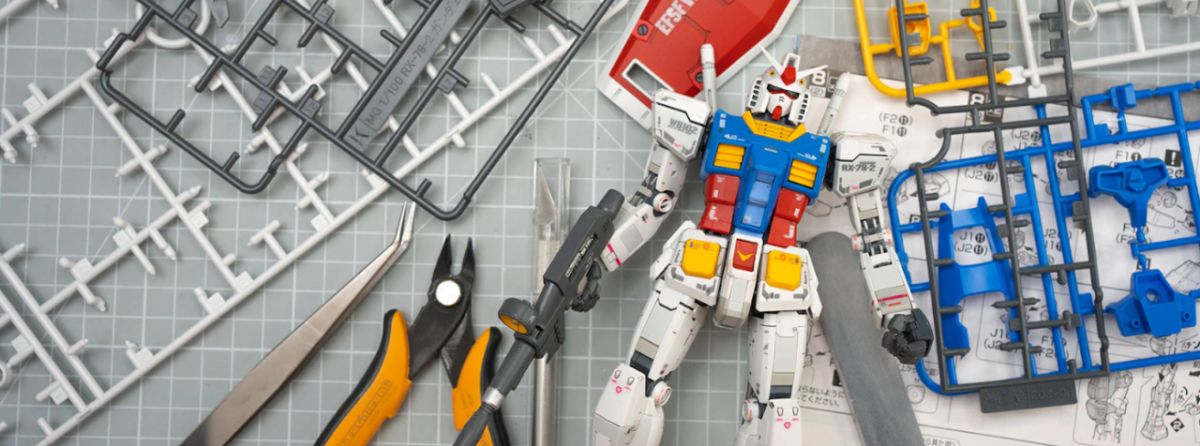
Gunpla is a plastic model derived from a series known as Gundam which is an iconic Japanese animation that first started airing in 1979. The original series would soon end in 1980, but it had already made an everlasting impression. Gundam would go on to branch out into many different spinoffs and series and is now one of the most diverse, intricate, popular, and largest sci-fi series out there. Its popularity led to the creation of Gunpla. Gunpla is a word derived from the abbreviation of gundam plastic model. Ever since its creation, many hobbists have found themselves captivated by these plastic figurines and it has grown to be one of the biggest hobbies out there. Not only is Gunpla a way to create detailed and articulated models, but it is also a way for many hobbists, old and new, to be able to relieve stress and enjoy the satisfying click of two interlocking plastic parts.
The first Gunpla came out in 1980, and they were quite simple, requiring only glue and paint to assemble them. But as time went on, Gunpla began evolving into what it is now. After the 1990s, Gunpla began to become more sophisticated, needing no glue nor paint to be assembled together. Over the years, Bandai, the company that owns the rights to Gundam and Gunpla added more and more advancements and modifications onto each new Gunpla kit. These constant modifications steadily shaped Gunpla into what it is today; easy and fun to assemble, with great detail, functionality, and appearance.
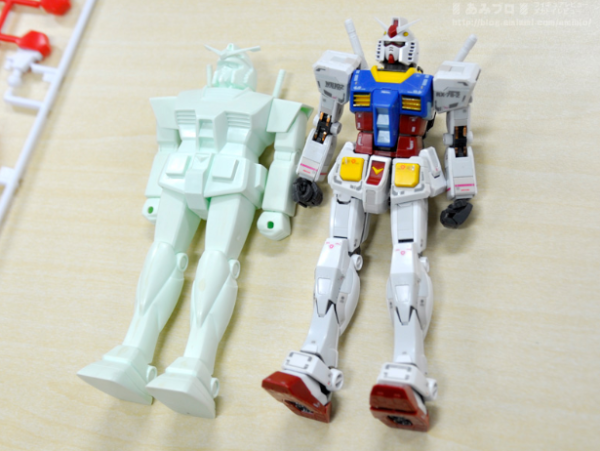
Gunpla is a great and rewarding hobby, and it’s quite easy to get into. Gunpla models(besides ones that predate the 1990s), require nothing more than a pair of scissors or plastic cutting pliers, and fingers. To customize and modify kits further, some Gunpla tools may be required. However, the basic supplies one needs for assembling a Gunpla kit are their own hands along with some cutting tools.
- Open the Gunpla kit box. Take out the sheets of plastic, known as runners, along with any stickers and instruction manuals.
- Each runner will be labeled. The labeling of the runner is very crucial in assembly. The blue circle below is of the runner identification and the red circle is of part identification.
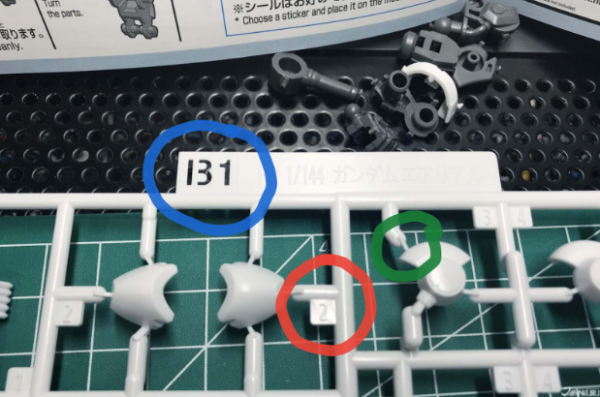
- Each runner will also feature a gate. In the image above, the gate is located by the green circle. In order to take a piece off of the runner, make sure to cut the gate, or use one’s fingers to twist the gate off.
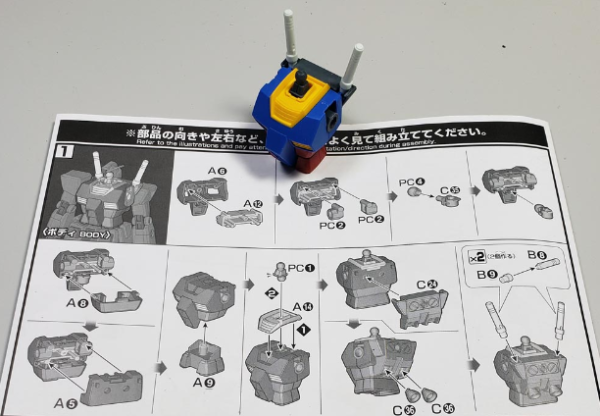
- Now comes assembling the Gunpla. Open the instruction manual and locate the steps. Although some of the text may be in Japanese, the creation of Gunpla doesn’t require knowledge of the language, as the instructions are simple pictures.
Courtesy of jonbius.com Now that the steps in Gunpla assembly have been covered, it will be good to cover different types of Gunpla, in the form of the Gunpla Grade.
- Find step one, locating the parts needed. In this case, in the picture above, one must locate part A6 and part A12 first. Now, locate the A runner and remove parts 6 and 12. Now snap together the two parts. All parts usually fit together like a Lego piece. Once this step is complete, one has successfully completed step one. Now all someone needs to do is to go through the rest of the steps and assemble the Gunpla
- The main component helping one in assembling a Gunpla effectively and perfectly aren’t tools, but rather patience and determination. Do not be deterred if one’s first Gunpla is hard to assemble or fragile. Plenty of other Gunpla kits on the market are way more stronger or easier to assemble than others. If after multiple failed attempts and frustrations, Gunpla may not be the right fit for you as assembling Gunpla should be relaxing and rewarding. However, do not let one horrible kit ruin your entire view on Gunpla as plenty of other kits are quite the opposite.

Courtesy of Amazon.com The image above is of the cover of a Gunpla box. On the top left corner is the letters HG, which stands for High Grade. Grades determine a Gunpla’s size and amount of detail. High GradeGunpla would have less detail than a Master Grade or Real Grade. There are many Gunpla Grades, however, the most common in order from least detail to highest detail include; Entry Grades, High Grades, Master Grades, and Real Grades. Naturally, since some Gunpla grades feature more detail than others, their difficulty to assemble differs as well. For example, a Real Grade Gunpla would be harder to assemble than that of an Entry Grade Gunpla. Now, below HG in fine print are the words, “The Witch From Mercury” which indicates which series the Gunpla is from. In this case, this Gunpla is from The Witch From Mercury series.
Most of the Gunpla are obtainable with a $20 budget are the Entry and High Grades. These kits are in 1/144th scale from their animation counterparts and are usually about 5 inches tall and are the easiest and often sturdiest to assemble. For beginners, Entry and High Grades are the most recommended as they are often the most versatile and strongest kits out there.
Meanwhile with a budget of $50, one can get their hands on a Master Grade or Real Grade Gunpla kit. Master Grade Gunpla are at a scale of 1/100 while Real Grades are at 1/144 scale. Master Grades are often referred to as taller High Grade kits and are recommended after the assembly of two High Grade Kits. A Real Grade kit, however, is often much harder to assemble, but features many more details. They are recommended after one or two assemblies of a Master Grade kit.
Gunpla is a great and exciting hobby that anyone can get into easily. From Entry Grade kits which require nothing more than hands to assemble, to the Real Grade kit, featuring great details. The world of Gunpla is diverse and enticing and one that will leave every hobbyist waiting and anticipating their next kit.


